
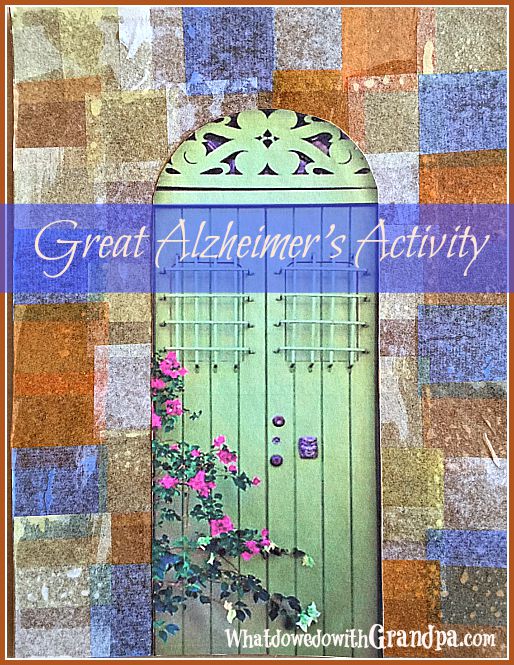
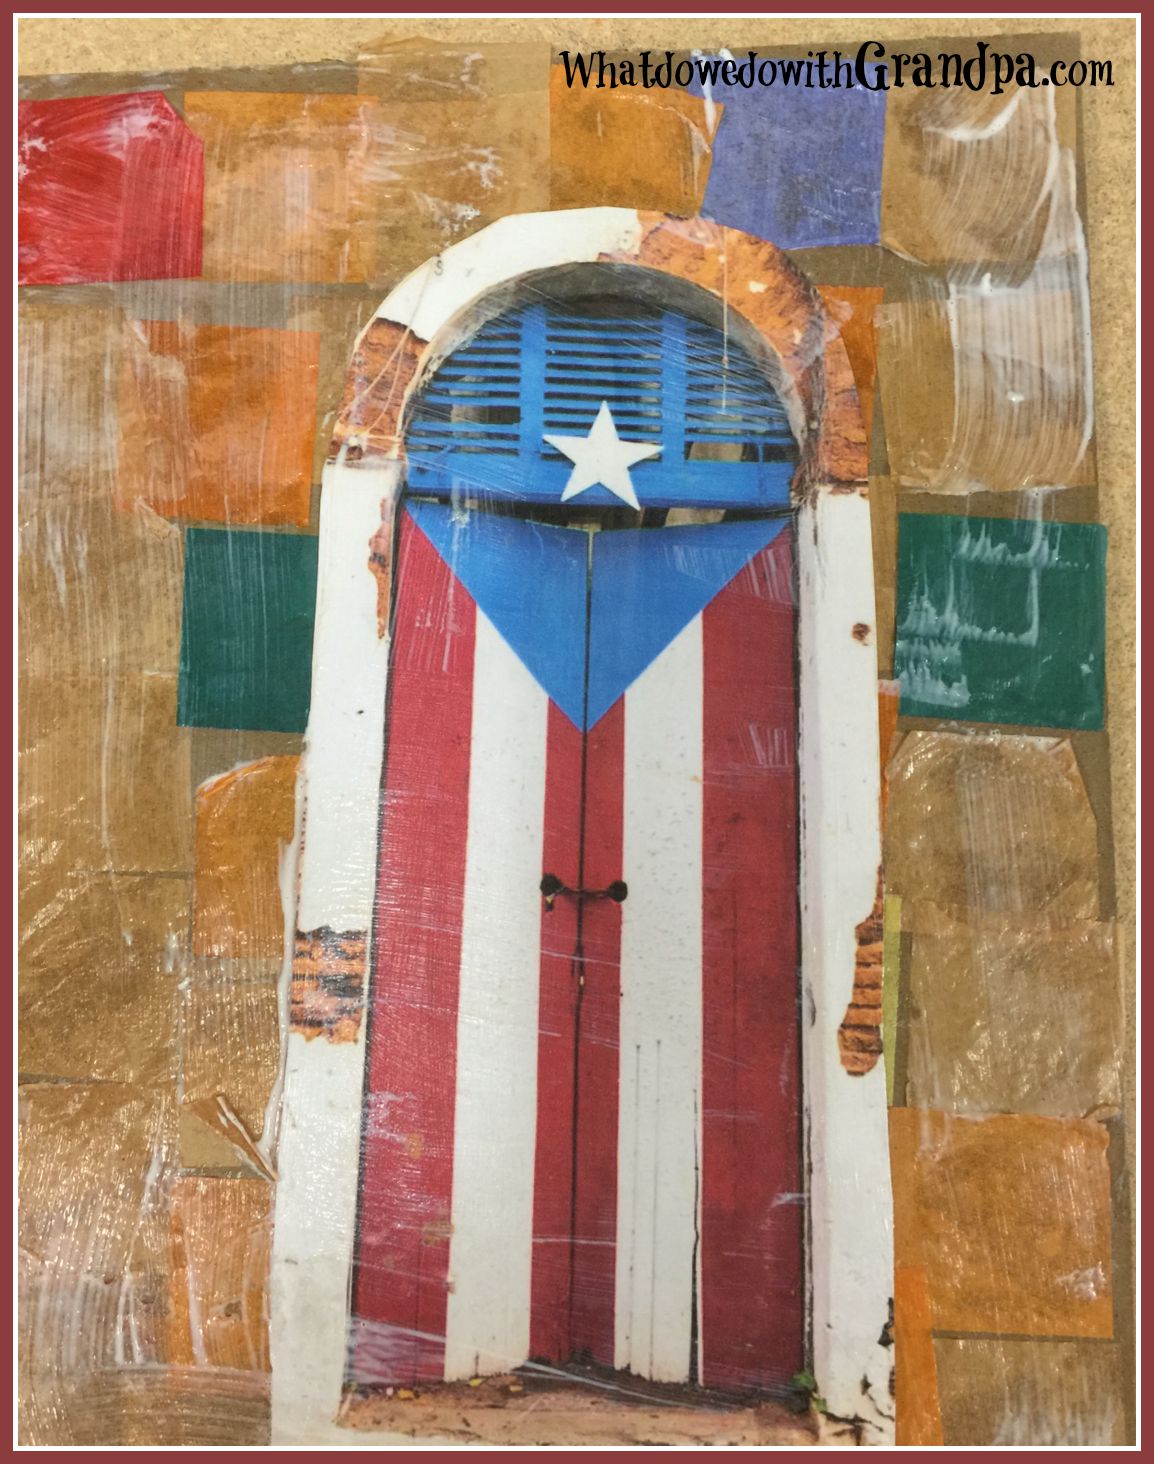
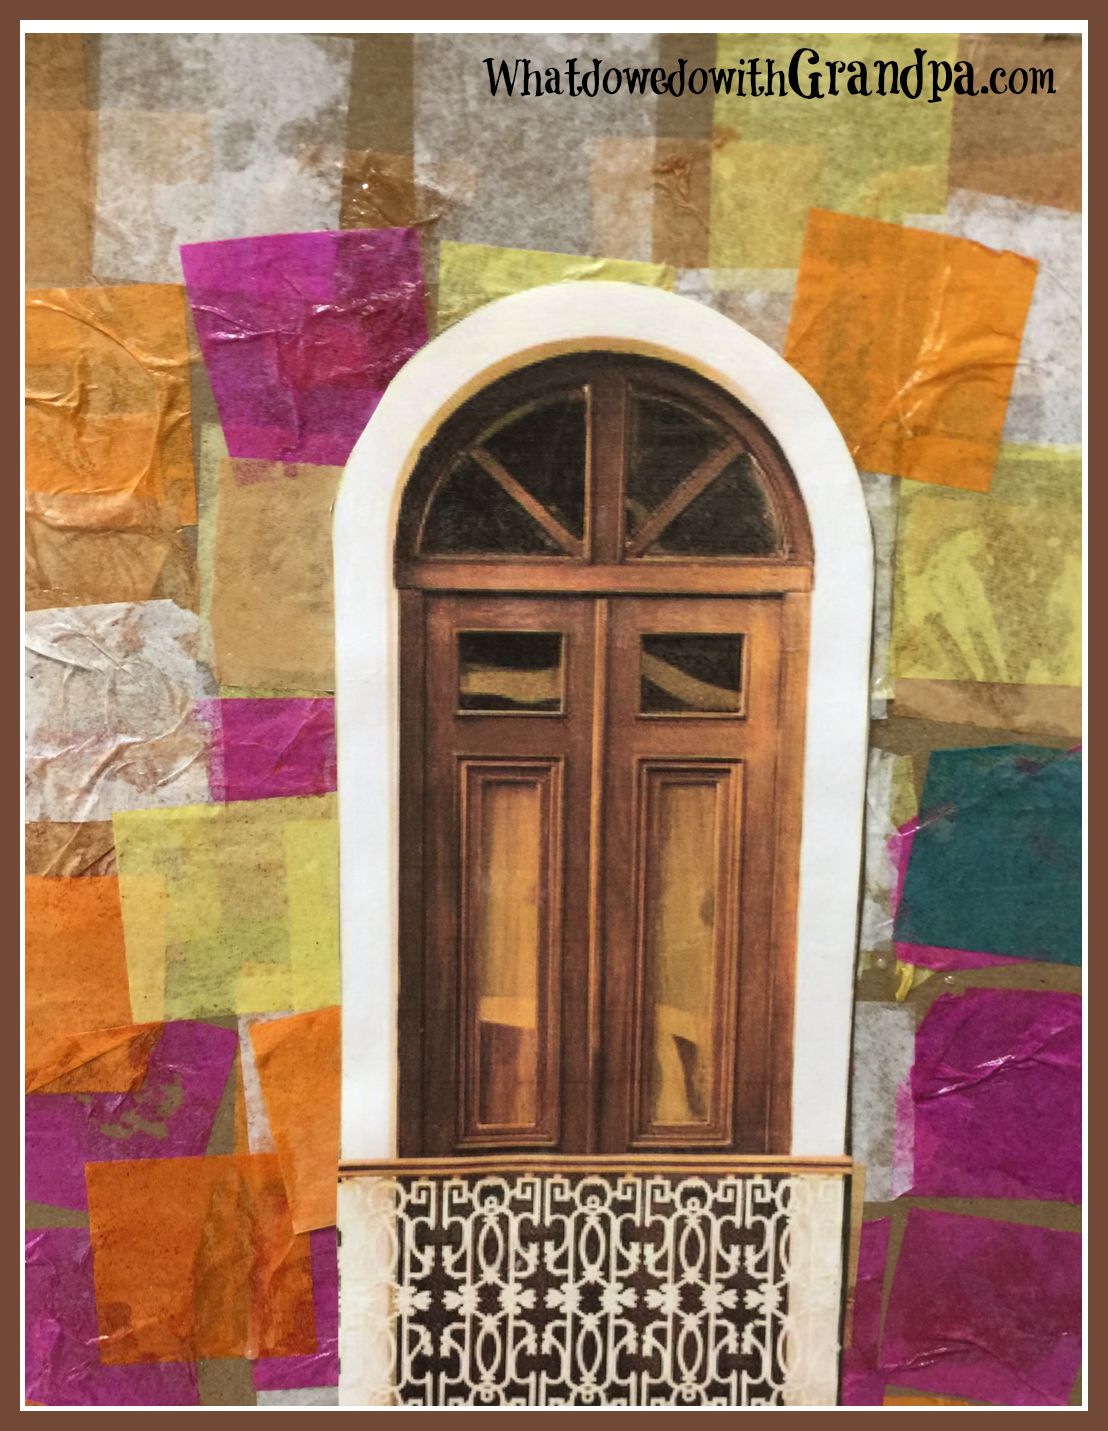
This project is another easy and inexpensive Alzheimer’s Project and would actually be fun for all ages. The key with almost everything I do is to make projects and activities adult-like even if they are simple to do. I find that with my Dementia/ Alzheimer’s Crafters, it is helpful to include something familiar in a project…. The country we were focusing on for the day was Puerto Rico, so I chose doors from that country. You could choose any doors, or for that matter, any image that would lend itself to looking appropriate on this background. For example, a picture/ photo of a pumpkin would look great on the above background.
People with Alzheimer’s (or other versions or dementia/ cognitive decline) need to have the steps broken down for them into the simplest form. For instance, you would only give them the chip board and tissue paper squares to start. Do not even put the doors out on the table until the fist step is complete. Otherwise, the door might go down first. With Alzheimer’s, the order of things becomes scrambled, so it is important to take one small step a time.
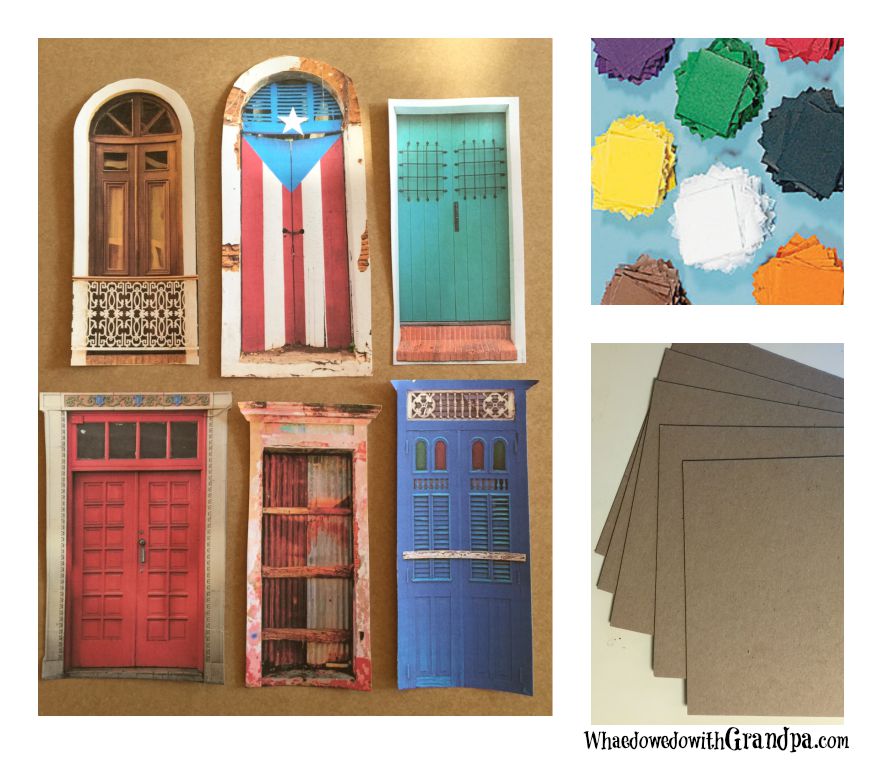
Here are the supplies you will need:
Images of Doors (printed off the internet or taken from your own camera and copied
onto cardstock.)
Tissue Paper Squares (I got mine from Oriental Trading Co. and they were precut (1 1/2″)
They did, however have to be separated because they were all
stuck together which took time. You can also cut your own.)
Glue (Elmer’s type glue is fine)
Chip Board (8 1/2″ x 11 size…..Chip board is cardboard —like on the back of pads of paper. You could use any stiff cardboard as long as its greyish brown. It looks good if the
brown color shows through the lighter colored tissue paper squares).
Foam Brushes (1″, for applying the glue and Mod Podge)
“Mod Podge” (not totally necessary but recommended as a topcoat to create a
nice finished look and to help the squares to adhere better)
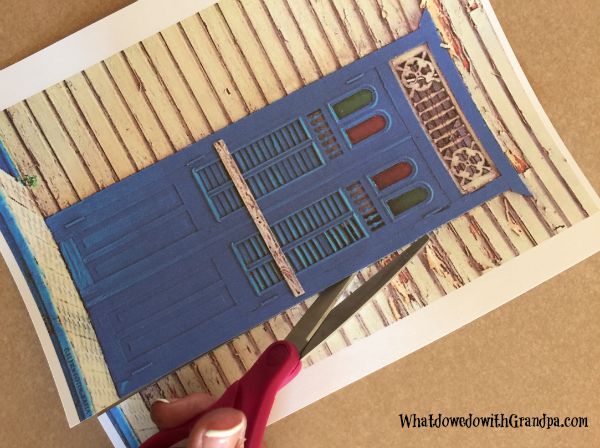
STEP 1: (Prep Work) Print out images of doors from your computer onto white cardstock and cut them out and then cut out 1 1/2″ tissue paper squares in various colors if you didn’t order the pre-cut ones. (Pre-cut squares must be separated ahead of time.)
STEP 2: Apply tissue paper squares (overlapping them) with glue and a 1″ foam brush to chip board…..a few at a time until the whole board is covered. (Note: small tissue paper squares are easiest to use for Dementia/ Alzheimer’s crafters; otherwise, the pieces get wrinkled up and are hard to apply.) SUPERVISE CLOSELY WHEN USING GLUE TO ENSURE SAFETY!
STEP 3: Choose door image, apply thin layer of glue to the back and place on top of the chip board covered with tissue paper squares from Step 2. Smooth door down with hands so that edges adhere properly. (This takes a little time to do.)
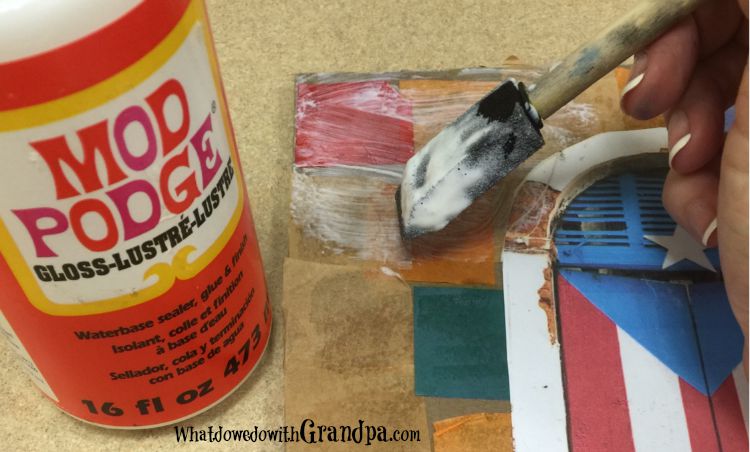
STEP 4: Apply “Mod Podge” over entire board to give it a finished look.
HERE ARE SOME FINISHED PIECES DONE BY CRAFTERS IN VARIOUS
STAGES OF ALZHEIMER’S / DEMENTIA:
